Playful

Showing posts with label easy. Show all posts

Thursday, June 21, 2012

Letter fun with silverware

   The other day while C was eating lunch she said, "Look mommy, I made the letter T."


 She had made the letter with her silverware.    She was so proud.

Next, she wanted to make the letter X


After trying to make an X from memory, she asked me to make an x with my silverware so I did.


Then she wanted to make a letter A.

She realizes here that she will need another piece of silverware so she asked me for one and I got it for her.


She's so proud of her letter A!

Then she made a Y.


 Next up, an H.

I love watching her learn and watching her impress herself.  Her imagination and creativity amaze me everyday.   This activity is great for motor skills and letter formation.  Although she cannot write letters yet, it is nice to know that she knows what they look like and can form most of them from memory.  This is an excellent pre-writing activity.  

Thanks for stopping by!
Shawna

Wednesday, May 9, 2012

Letter L-Simple Activity

      We do a variety of activities around here.   My goal each week is to provide children with fun learning activities.  Today's activitiy is simple and requires little prep work.  Before doing this activity, I showed them a lion, the letter L card, and a letter L button.  We pointed and said the letter and the sound. 
 
     
     We used poms poms and eyeballs(they love those) and glued them on the letter L that I wrote.   They used paintbrushes to paint glue on the the letter L.   Next, they attached eyeballs and pom poms to their letter.   Their imaginations were running wild!    As they were creating, they were showing me their monsters and telling me how many eyes they put on their letter and what color of pom poms they were using.  


   Overall, the activity was  nothing fancy.   But the kids loved it.  They were learning and having fun! Best of all, it  required little prep and I had all the materials on hand. 

Pin It

Saturday, May 5, 2012

Blocks turned into learning dice

    
      If you have blocks and kids you will love this idea or post!  With toddlers their attention span is very small and I am constantly thinking of activities that are quick, easy, and educational.  What's great about this idea is it can easily be modified for older children as well.   The other day I was thinking of how much my children would love rolling dice and then it hit me....the block set that we have has the perfect size cubes for dice for younger children.  


    These dice are perfect because they are large enough to not be a choking hazard and the kids have a blast rolling the dice and running for it on the other side of the room.   Not to mention its a great movement-hands-on learning activity.   Their learning and reviewing at the same time.  Best of all, they were free!  I already owned them.  My kids never build with the small cubes so I figured I would put them to use.
Materials you will need to make the dice
  • Cubes
  • Sharpie or pen
  • Stickers

These dice can be used to review the following:

animal sounds( you can write the animal sound and have the child say the animal or you can write the animal and have them make the sound.

animals (put pictures of animals on each side)

uppercase letters

lowercase letters

colors

sight words

numbers

multiplication facts

addition facts

subtraction facts

division facts

vocabulary words

shapes


Sight word dice. 
 The word that is on the top, that is the word the child reads.  This dice has at words.

colored dice

animal sound dice
     Say the sound and have the child say what animal it is.  Or on the top you see dog,  say dog and the child would say the sound "woof."

     You can put on the dice what you feel your child needs the most help with.  For example, there are about 5-6 lowercase letters that C mixes up  so she has a lowercase cube.  It helps to put a couple letters or items that you know they know or they love.  This helps build their confidence and keeps the activity from being overwhelming.

     Modifications:  Leave 2-3 sides blank and if it rolls on that, then the child gets a freebie and gets to roll again.  This is great for children with short attention spans.


I'm linking to
I heart naptime
I can teach my child
No Time for Flash Cards
abc and 123
someday crafts
Pin It

Saturday, April 21, 2012

Spring Wreath

      Last year I decided to make a rosette spring wreath.   After hanging on the door for a month it split in 2 pieces.  I was set to find a new wreath.  After spending the last year looking at stores for wreaths, I decided to make one.  I couldn't convince myself to spend $30-$40 on a wreath.

    I went into my craft closet and found a grapevine wreath I bought about year ago and was waiting until I got inspired to do something with it.  I grabbed felt (I had leftover from a Christmas tree I made in December), hot glue, wooden letter k, and jute.   Best of all I had everything I needed! 


Want to make one?  Here's how:

Materials:  a grapevine wreath, felt, scissors, hot glue, a letter, and jute
1.  I made the flowers using rolled felt flower tutorial tutorial.  It was so easy!  Literally it takes seconds to make.  I made 6 flowers. 
2.  I wrapped jute around the letter k.  After every couple wraps I would hot glue the jute onto the k.
3.  I laid out the letter and the flowers on the wreath until I liked where they were. 
4.  When I was happy with the placement I attached the flowers and letters with hot glue.
5.  Stand back and enjoy your masterpiece.


I love my wreath!  It was so simple, cheap, and easy to make.  It took me less than 30 minutes!  That is my favorite kind of project.


I'm linking to
i heart naptime
nifty thrifty things

Wednesday, April 11, 2012

Take 2

In my previous career, I taught 4th grade.  As a teacher, we are taught to constantly reflect on everything and ask ourselves,  "How we would do it different next time?"   Well...every time I walked in the bathroom I saw a failed attempt at art.  It BUGGED me!  This is what I saw:


      Yikes!  Do you see what I see?  The lines are uneven and bumpy.  Honestly, I would be embarrassed for an adult to use that bathroom and see my poor attempt at art.
  
    After looking at it for a week, I decided to try it again.  I loved the color and coziness that it brought to the bathroom even though it looked sloppy.

   This time I went back to the original source to see what I did wrong.  I noticed they spray painted the canvas all one color instead of using a paint brush like I did.  I wanted to use blue, green, and lavender to coordinate with the rug and the shower curtain in the bathroom.  I decided to see if I could do a couple of things differently before I made the choice to spray paint using 1 color.
      
    For attempt 2, I used the same width tape instead of cutting a thicker tape which left crooked lines the first time.  Then,  I went around each edge of the tape and pressed it down with my finger to ensure that the  tape was sealed tightly.  As I was painting, I continued to press down the edges of the tape and painted gently around the edges hoping for smoother lines.  I painted 2 coats of paint of each color and let it dry about 2 hours between each coat.  Then, I made sure it was dry and took the tape off and Ta Da!


Do you see what I see? Smooth lines! I am so happy with how the 2nd attempt turned out.   I am thinking about a larger one for our family room downstairs in the future.  We shall see.


     Overall, the painting was cheap to make.  I spent $7 for 2 canvases at Wal Mart. I already had the paint.   If I knew it was going to turn out great the second time, I would have bought a bigger canvas.  Eventually, I plan on adding the other one next to it when I decide what I want on it. 
    
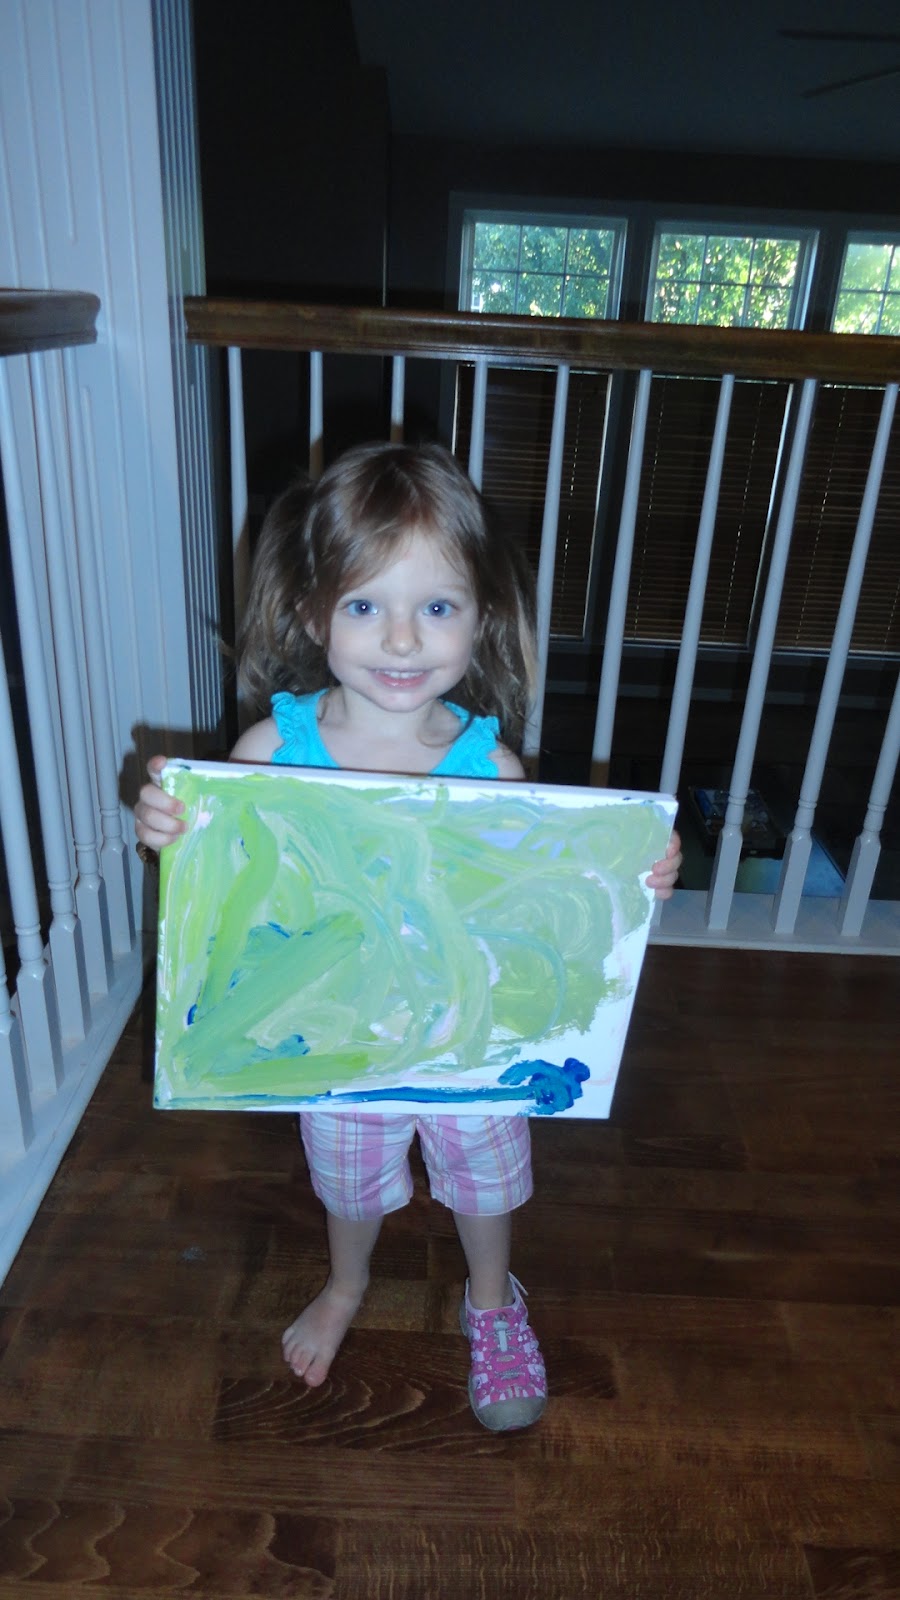
     I am all about getting kids involved with creating art.  With the help of an adult this would be an easy project for a 9-12 year old to do.  They could create a piece of art for their room or for their grandparent.  I let my 2 year old daughter free paint the other canvas while I was painting mine.  She loved it!


I could not seem to keep both of her shoes on today.  This was the third time she was walking around with one shoe off and one shoe on.