Playful

Thursday, July 12, 2012

Dairy Free Homemade Chocolate Chips

     Have you ever wanted to bake something with chocolate chips in it and looked in the pantry to find out you didn't have any?  I have and it's so frustrating!  A couple weeks ago, I found out that C could no longer have dairy.  All the chocolate chips we had in the house had milk in them.   I decided to experiment with different dairy-free recipes I have seen on-line.


  The first one I tried was from Whole New Mom.  Her recipe called for agave nectar as the sweetener.  I did not have agave, but I used sugar instead.  The chocolate was bitter(too much cocoa powder) and crunchy(sugar did not dissolve).    Overall, I liked the concept of making my own chocolate so I kept this recipe in my mind.

    The second recipe I tried was from Heavenly Homemakers.  I absolutely love her site.  This recipe wasn't bitter, like the recipe above, but  it wasn't chocolaty enough.    She uses butter, but the recipe says you can also use coconut oil so I did.  I'm not sure, but I think the butter would taste much better, but I was looking for a dairy free version so butter was not an option. ( I did try a batch with dairy free butter and it was not a success).  She used sucanet for her sweetener and it made the chocolate crunchy.

   After testing those recipes out and making chocolate several times, I decided to combine the best of the 2 recipes to make my own adapted version of homemade chocolate chips.

Ingredients
  • Coconut Oil (I use Trader Joes)
  • Cocoa Powder
  • Vanilla
  • Agave Nectar


1.  Melt 1 cup of Coconut Oil in a saucepan on low heat.


2.  Once melted, remove Coconut oil from heat and stir in 1/2  cup plus 2 Tablespoons of Cocoa powder, 2 teaspoons of vanilla, and agave nectar to taste.  I usually add 6-8 Tablespoons of agave.  The more you add, the softer the chocolate is.  (It doesn't set up as well).  Taste the chocolate to decide if you need more.  But I would rather have it be a little softer and taste delicious. 


3.  Pour the chocolate in a small pan.  I use a 9 x 9 round cake pan because that's what I have.  Place in refrigerator or freezer to set.  


4.  After 1 hour, it should be set. (I usually don't wait longer than 20 minutes).  Take it out and cut into small chunks.


 So yummy!  I could eat the whole bowl full.

 You could also serve it in individual glasses for a special treat.

 C approved!  That's saying a lot when it comes to eating dairy and wheat free.


This chocolate is delicious.  Go in the kitchen and make some right now!  C did not like the first 2 recipes I made, but she loves my adapted version!  It takes 5 minutes to make and that is all.  You can eat it plain, add it in baked oatmeal, or add it in granola.   It is easy to make and delicious. 

Please note:  These are different from the chocolate chips at the store; they are pure and soft.  When baked, they melt.  If you put them  in the right dish, they make a delicious, yummy recipe.  If you are making these you are most likely looking for a healthier, gluten and dairy-free, or homemade chocolate chip recipe.  Please keep that in mind and enjoy.


Thanks for stopping by!

Shawna

Friday, July 6, 2012

Counting Fun with Fish

     Today I am going to share a counting activity with you.  I found inspiration here.  The kids had  fun painting, counting, and singing.   This project has a secret that I added...read on


Here's how we made it

Materials
  • Velcro
  • card stock for bowl
  • cardboard for fish
  • numbers (or marker to write the number)
1.  Draw a fish pattern on a piece of paper and cut it out.


2.  Trace the fish on cardboard.  I made 5 fish for each child and then a couple extra.  (When working with kids things seem to disappear or tear and it's much easier to make a couple extra when your making all of them than to have to go back and make the part that's missing.) 

3.  Cut out the fish and attach soft, furry Velcro on the back of each fish.  (Yep that's the secret!  Children can remove the fish) 

.
4.  Draw a fishbowl and cut it out.  The stronger the paper the better!  If you have extra cardboard that would be best.   (Or if you can laminate it that would work great too, but do step 5 first).

5.  Have your child paint the bowl blue, coloring, or markers would work fine. I knew for best coverage for my children paint is the easiest.


6.  Put numbers on the fish.  You can do it or have them do it.  My children loved doing it and they were saying the numbers as they were putting it on. It was great number practice.


7.  Let the bowl dry for several hours, overnight would be the best.  (I didn't and we had one wounded).

8.  Place the rough Velcro circles on the bowl once it is dry.


9. Have children place the fish on the Velcro and show them how you can remove them.  Sing the counting song posted below.  I used the children's fish and put them in a pile and counted with them while singing the song. They loved it!  Be prepared to do the song over, and over, and over again.

    
      For snack, we had goldfish crackers.  While they were eating, I was singing the song and would take one of their crackers away.   They just laughed and laughed.


Sidenote:  C's bowl has an extra velcro on it  because after we were finished she saw the extra fish that I made and wanted to put the number 8 on there.  I went ahead and let her.  She can count to 10 easily so is not confused by seeing 1-5 and then 8.

Counting song
1, 2, 3, 4, 5  I caught a fish alive
6, 7, 8, 9,10 I let it go again
Why did you let it go?
Because it bit me so. ( I add a sound effect "ouch!"  Kids loved it.)

Thanks for stopping by! 

Shawna


Pin It

Thursday, June 28, 2012

Monkey puppet

     Kids love puppets!  Today we made monkey puppets.  I got the inspiration here.  They are so cute!  Now, this activity took some prep work from me, but the kids love playing with the puppets after they are done making them and that it makes the extra effort so worth it. 

Materials you need
Brown, white, and red construction paper
googly eyes
paper sack
scrapbook paper (construction will do)

Here's how we made it
1.  I made a pattern for the monkey's head, ears, mouth, tongue, nose, tail, and hat by looking at the example. 


2.  Then I cut them out and traced each part on colored paper and cut them out.  And made piles of all the materials for each kid.

3.  We glued the hat and the red strip onto to the top of the paper sack.

4.  Add the eyes.

5.  Add the ears and the mouth onto the paper sack.

6.  Glue the tail onto the back of the paper sack.

7.  And you have an adorable monkey puppet.


Side note: I do not have a lot of pictures along the way since this monkey has several steps to it and I was busy helping toddlers.  They always want to put glue on EVERYTHING.  

Thanks for stopping by!

Shawna

Pin It

Tuesday, June 26, 2012

Pudding Feet painting

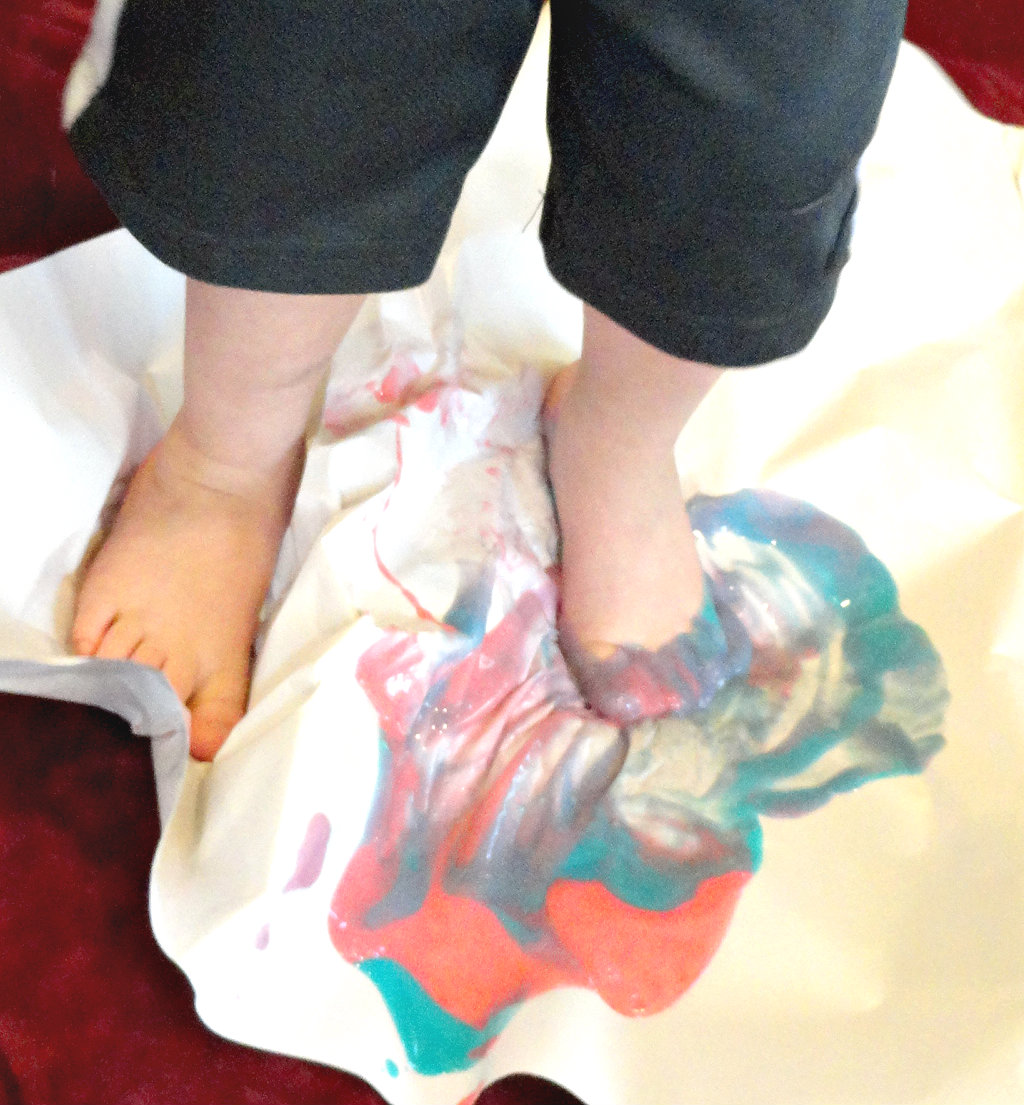
  We painted with our feet today!  It was so much fun!  It's a great sensory activity, following direction activity, and just plain fun.   I have had this box of Jello pudding sitting in the pantry for a couple of months so I decided to use it for this activity.  Pudding cleans up easier than the regular finger paint in my opinion.  

Here's how we made:
Make the pudding according to the instructions on the box.  (I used milk that was about to go bad).

Waiting for me to give the pudding to color.


 Each kid picked a color and put it in a bowl.  I put the dye in the bowl for the 22 month old.  

Then stir.


I asked each child what color he/she wanted and dropped some on the paper.   Then the painting began!


Skating on paper.


Looking at C's picture.

Little A did not move.  She had a huge hole in her paper where her little feet were.  She wasn't quite sure what to think of the pudding on her feet.

K loved it.  He painted two pictures.

C loved it also!

I'd say this face says it all!  

      This activity was so much fun!  They painted for 30 minutes and not 1 of them got off the blanket.  The clean-up was easy.  I wiped their feet,  tossed the blanket in the washer, and laid it outside to dry.  We had so much fun painting with our feet and look forward to doing it again soon!

Thanks for stopping by!

Shawna


Pin It

Friday, June 22, 2012

Patriotic Fruit Kabob With a Twist

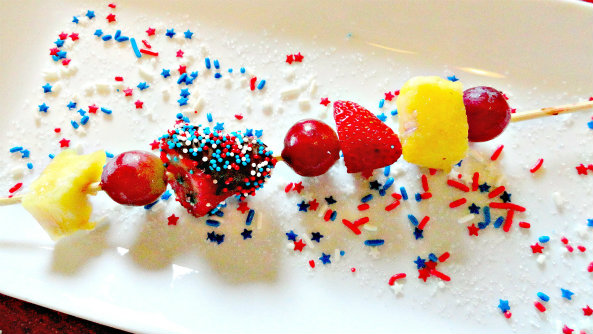
    Today I am exicted to share with you my fruit kabobs with a sweet treat on them.  They have 2 of my favorite foods: chocolate and fruit.  I don't know about you, but I can NEVER eat enough chocolate!  I LOVE it! 

     
     While I was making fruit kabobs the other day,  I thought it would be a great idea to make a chocolate-covered strawberry and put one on my kabob.   Instead of eating 10-12 (or more) chocolate-covered strawberries, I ate 3 kabobs.  I felt satisfied and not guilty about eating a sweet treat.  C loved them as well!  She ate 2 of them. 


     I love these kabobs because they are so versatile.  You can add whatever fruit you want or you could make a kabob with all chocolate-covered strawberries on them.  YUM!


    These are the perfect summer treat!  Their light, sweet, and healthy.  I can't wait to bring a patriotic treat that everyone can feel good about eating  to our 4th of July gathering!

Side note:  If you are giving these to a younger child please be aware of the sharp point.  We pulled C's off and laid her stick down on the table.